

We carved pumpkins as a spouse and children for the first time in a long time! It employed to be a loved ones custom, for the 13 several years we lived on a cul-de-sac and received more than 400 trick-or-treaters every calendar year. But then we moved and now we really do not even get a single visitor on Halloween night time.
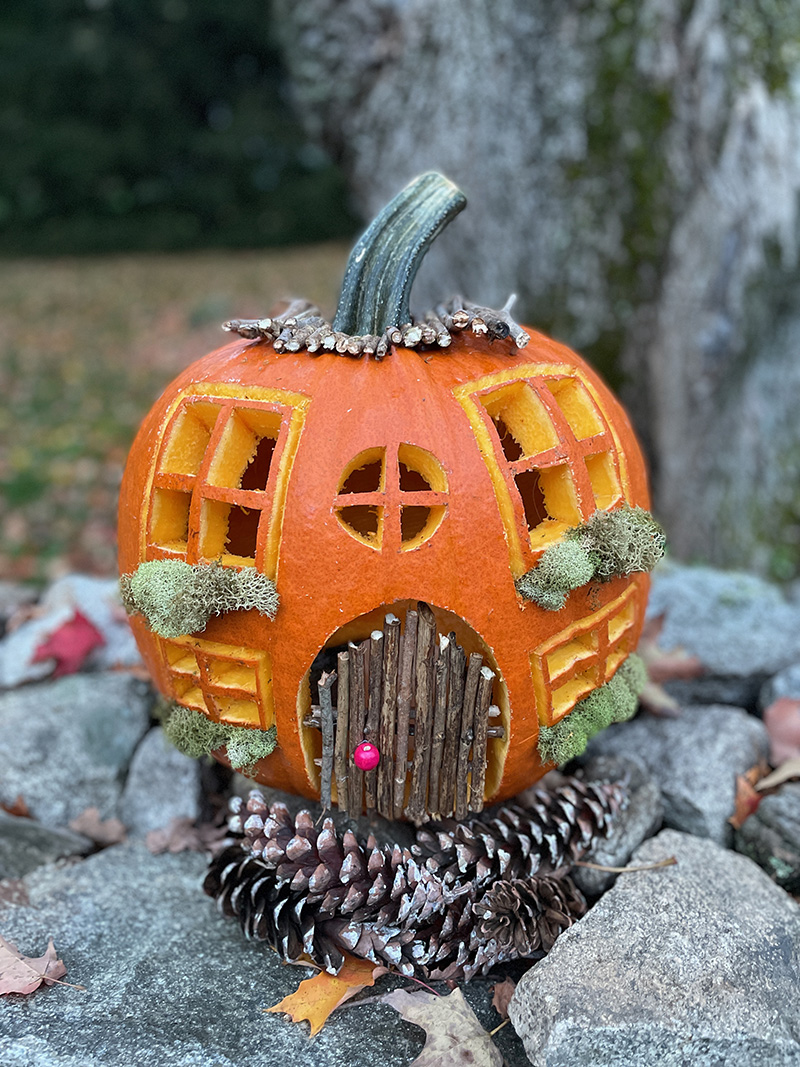
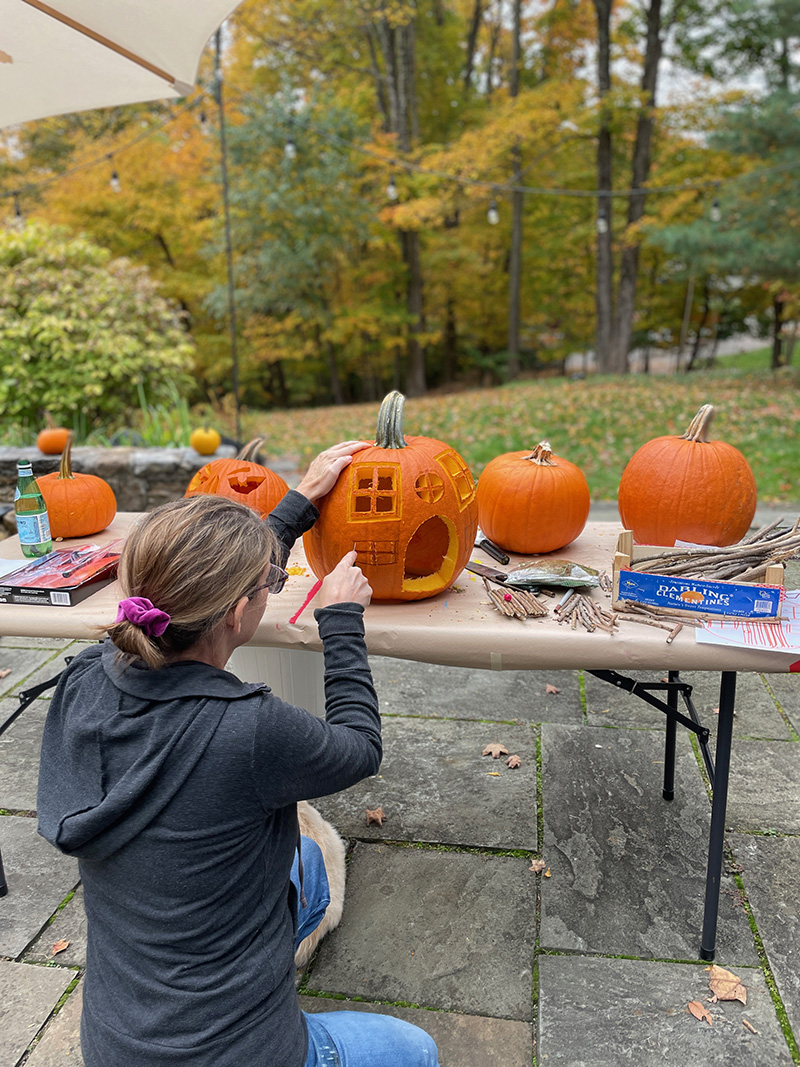
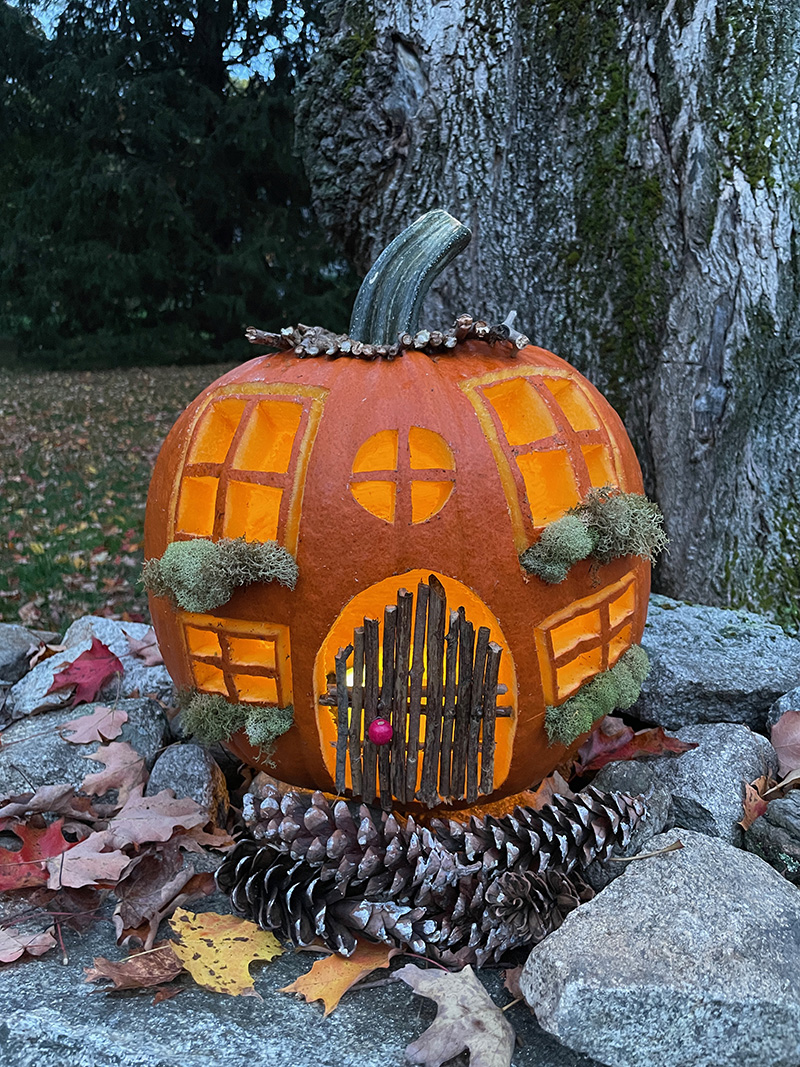
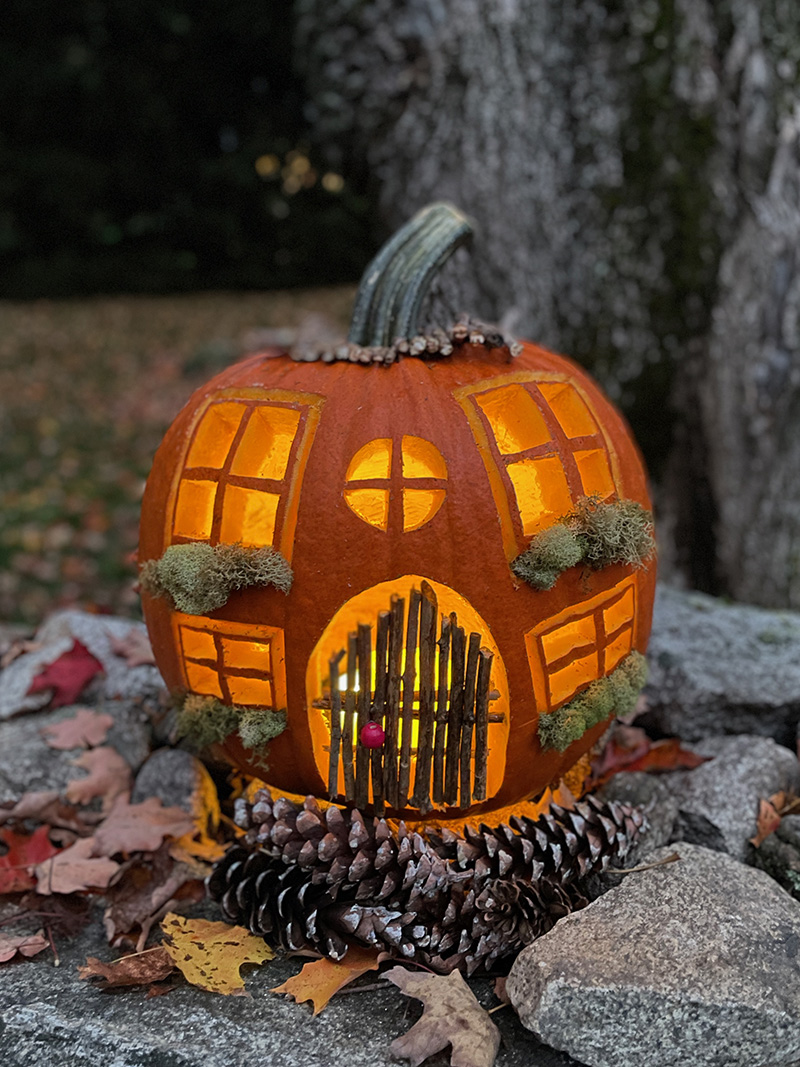
This weekend, while, our carving mojo arrived back and we made a decision to commit a entire working day creating some pumpkins for our stone wall. I had an notion for a pumpkin cottage and it virtually took me all day. Not that it was challenging to make, just a large amount of trial and mistake. And finding twigs and all the other resources. Allow me explain to you and demonstrate you how I produced it…
[ I am a participant in affiliate programs designed to provide a means for bloggers to earn small fees at no cost to you by linking to Amazon.com and affiliated sites. ]
Materials needed to make a pumpkin cottage:
~ Pumpkins (medium to massive are truly easier to carve)
~ Butcher knife
~ Carving instruments (a lot of grocery outlets carry carving sets like this – make positive they are durable!)
~ Twigs & hot glue gun for door
~ Moss for the window containers
~ Candles (we employed electrical this calendar year for the reason that wax candles ended up so high-priced. I purchased these and so significantly so fantastic. They come with a distant which genuinely assists. I used 2 candles per pumpkin)
How to carve a pumpkin:
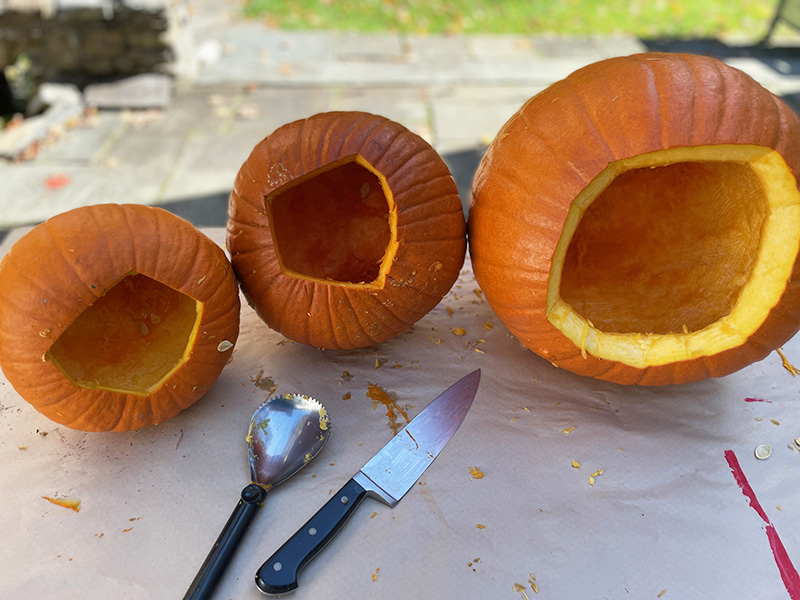
1. Slice open the base. We like to do it this way so that the stem is not disrupted, which actually helps make the pumpkins very last longer.

2. Scrape out the insides. Conserve the seeds to roast afterwards! This element is yucky (to me), it feels like guts. Which it is. My spouse does this section! He then scrapes the aspect that I’m going to carve extra than the relaxation so the layer is a small thinner to lower by way of.
How to make a pumpkin cottage:
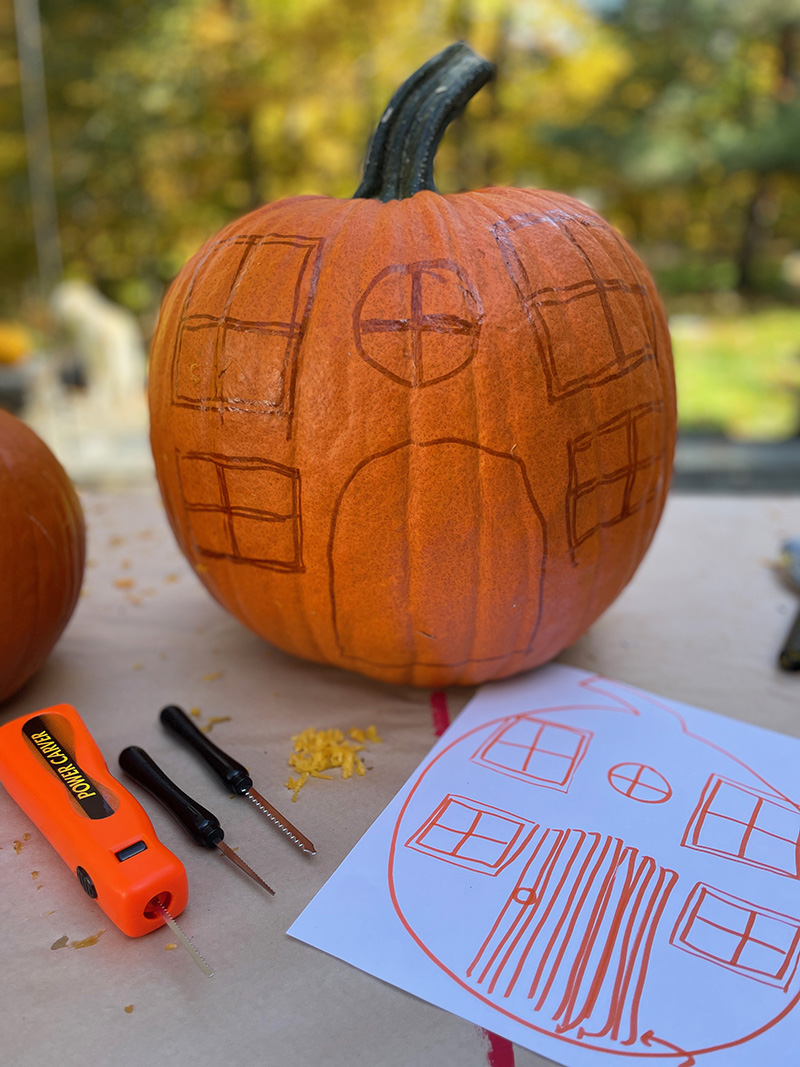
1. Start off by drawing your strategy on paper.
2. Employing a washable marker, sketch on to your pumpkin. I erased a good deal, and also erased as I went, moving windows all around and switching doorway styles. You just have to have a damp paper towel to wipe off the marker.
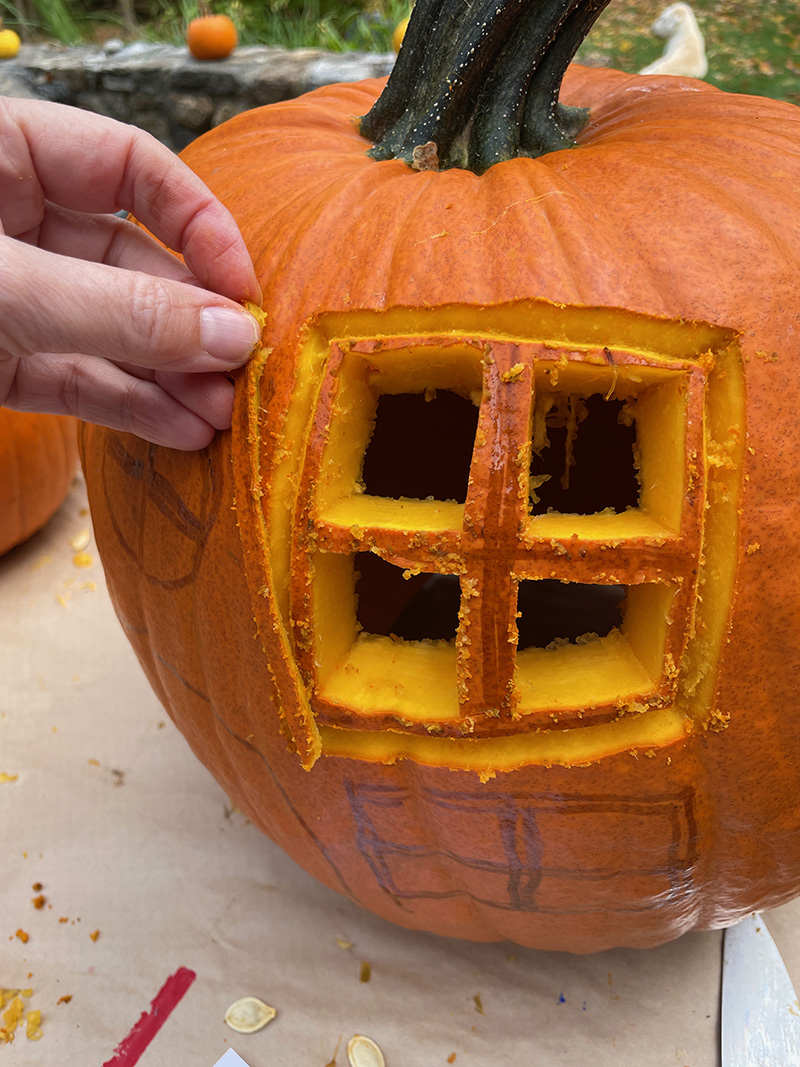
3. Slash the windows, then minimize minor wedges (slanting the small chopping instrument to make a “V”) for the molding.
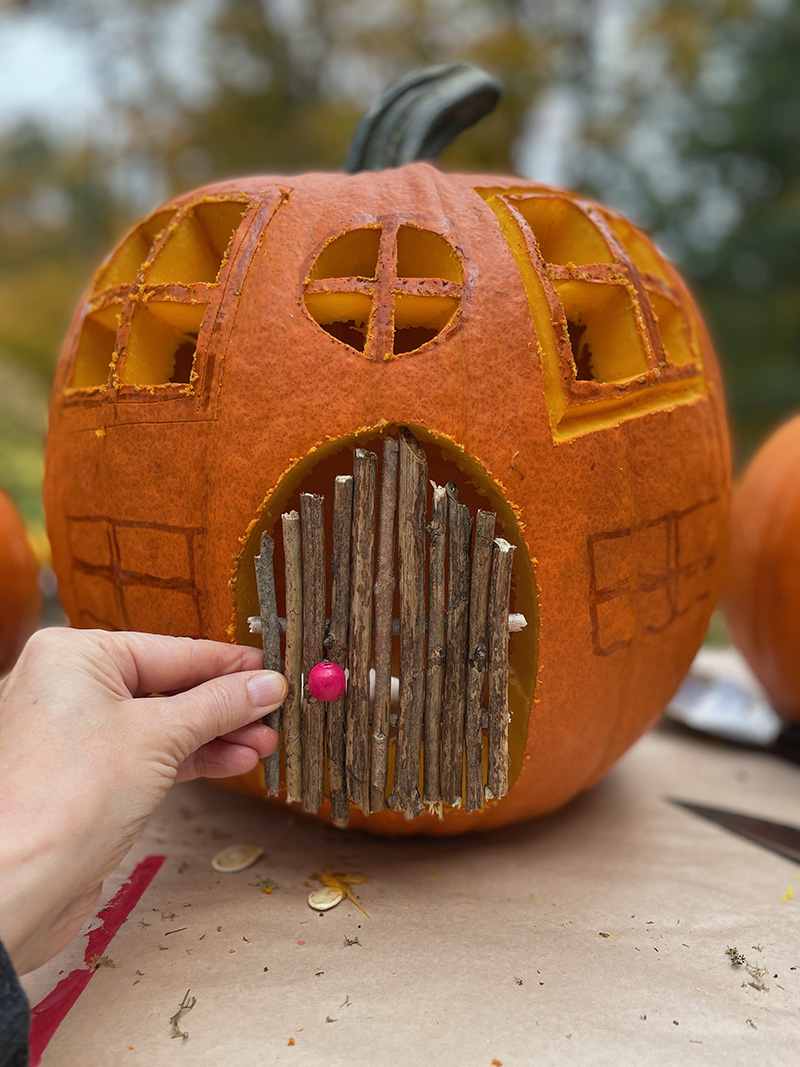
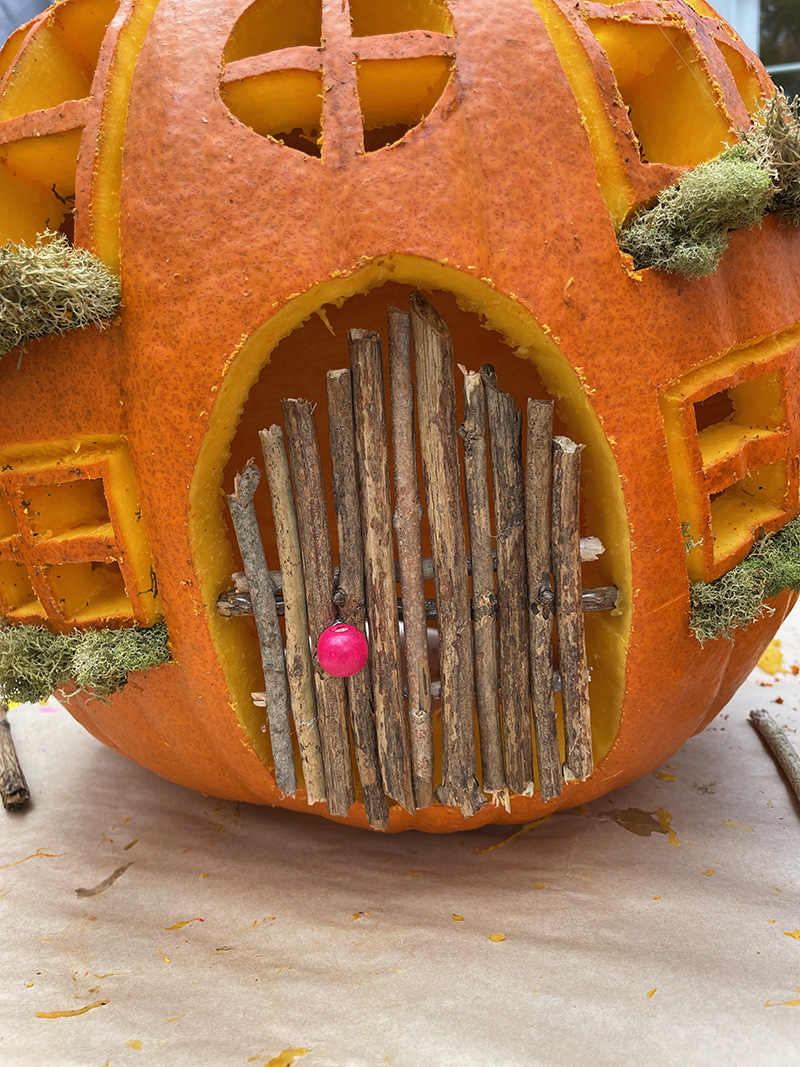
4. Make a door from twigs making use of a warm glue gun. I made use of a bead for the door handle. I actually built the doorway initially then held it up and traced all over it to make a condition a little bit even larger than the doorway.
5. Slice out the door shape.
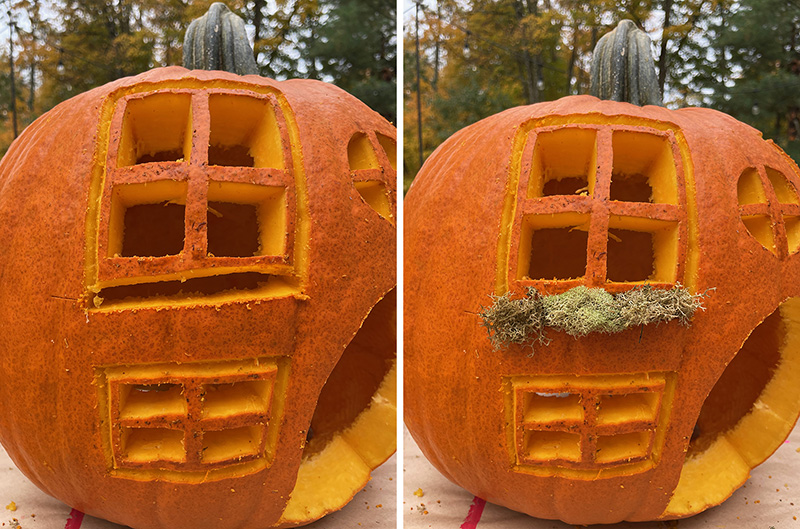
6. I thought a great deal about how to make the window bins, and resolved to reduce all the way through and things the moss in the crevasse. This appeared like the most effective way for it to keep in spot for a couple of weeks.

7. To attach the door to the pumpkin, I made a decision to wedge a stick in the sides and then scorching glue the door to the adhere.
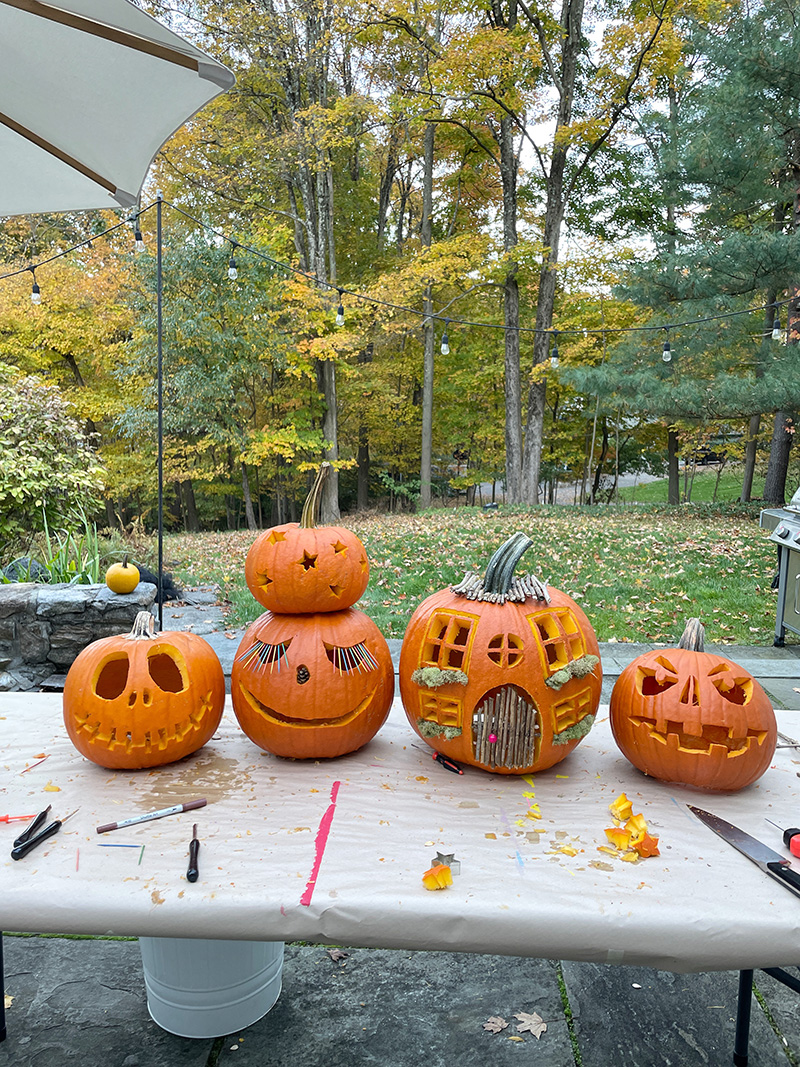
My little ones helped make the other ones! The stars had been designed by tracing a cookie cutter.
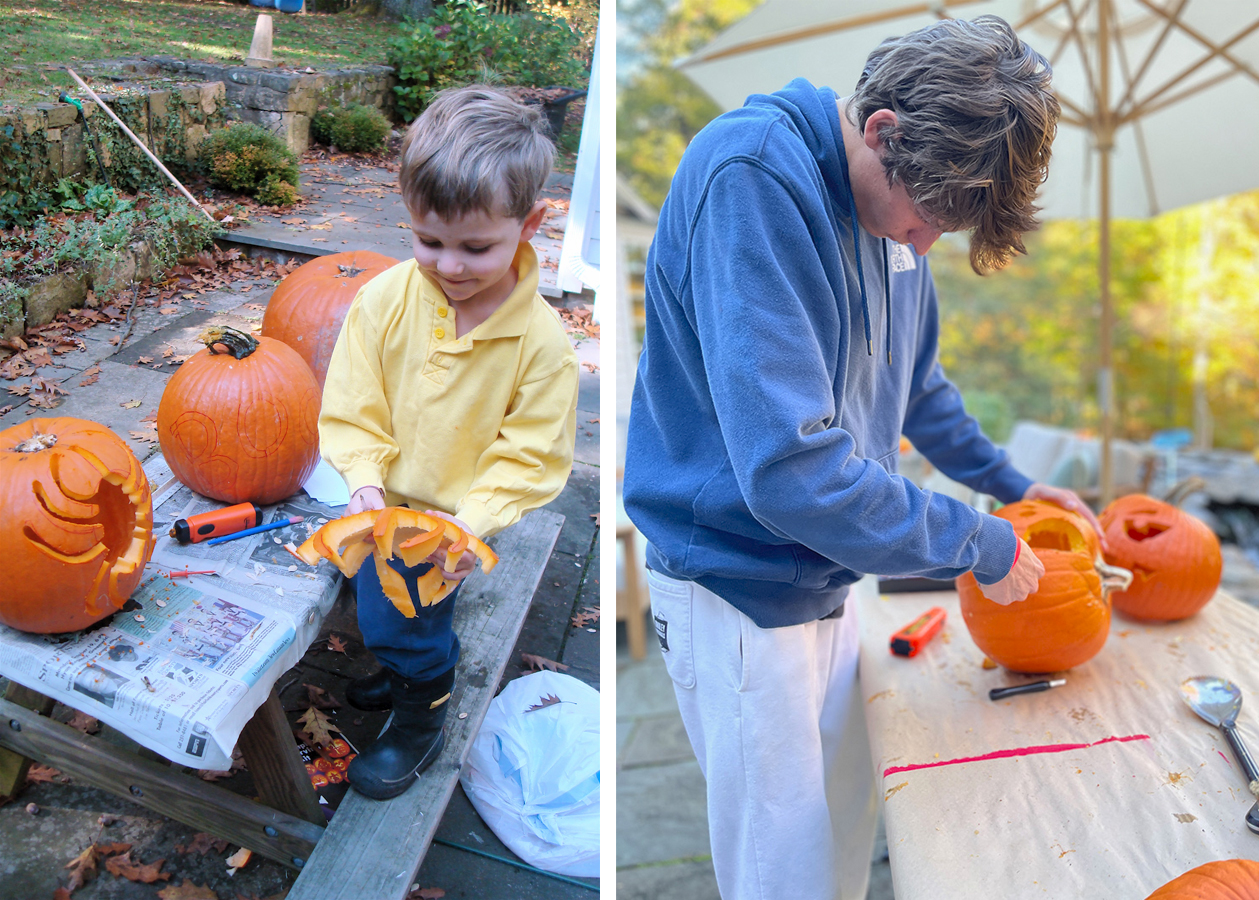
Here is adorable Nate as a 4yr old and a 16yr old… nonetheless loving carving!
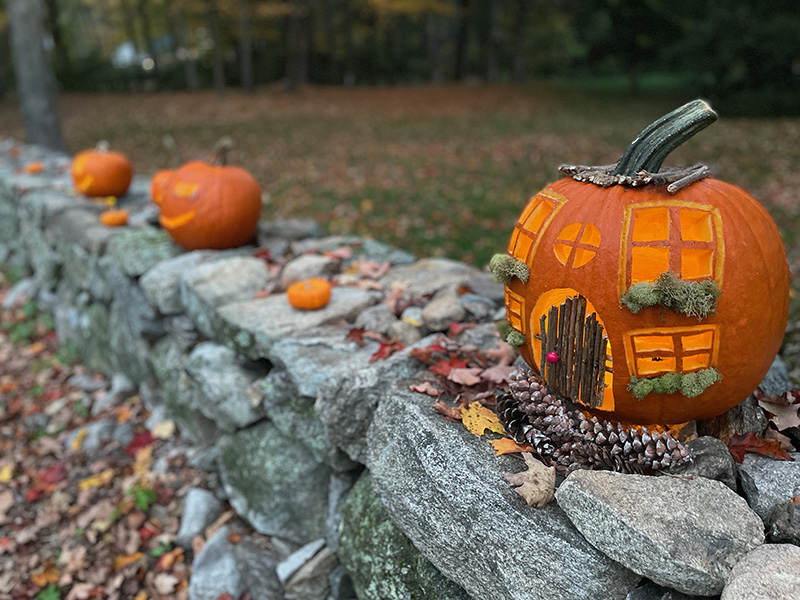
We placed them on our stone wall in the front of our home. I will report back again how extensive the electric powered candles very last!
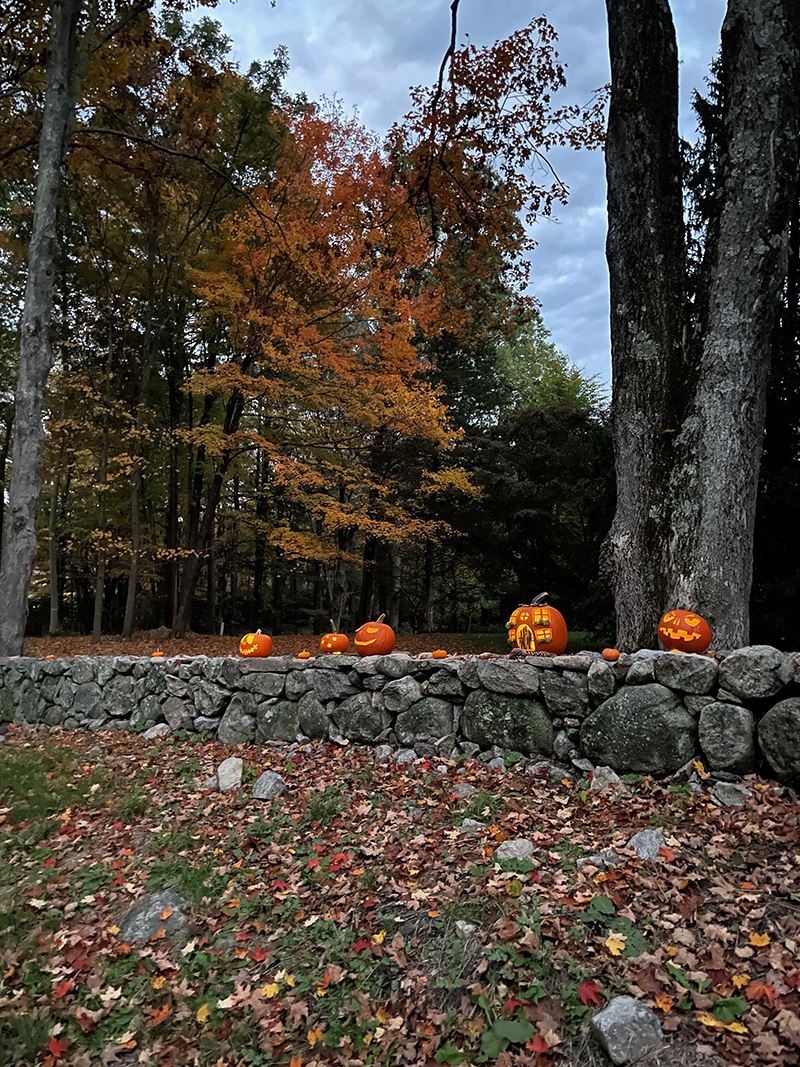
This photo I truly took when it was pretty much darkish. The new iPhones are pretty unbelievable in catching the gentle!
xo, Bar
– – – – – – – – – – – – – – – – – – – –
Did you like this publish? Below are more Halloween decorating suggestions:

25 Imaginative Halloween Decorating Strategies
16 No-Carve Pumpkin Thoughts


